1) A more secure way to pay
With the iPhone X, you can utilise the Face ID facial security technology to activate Apple Pay, allowing you to secure online payments as well as in-store. This function takes a 3D scan of your face using the phone’s TrueDepth camera, which Apple claims is far more secure than the Touch ID fingerprint scanning tech it replaces. Head to Settings -> Face ID and Passcode, and toggle on Apple Pay, alongside any other features you wish it to work with. Once set up, double click the side button to activate Apply Pay, glance at your screen then hold your phone on the reader.
2) A control centre you’re in control of
From the Torch and Camera shortcut to the Apple TV remote and ‘Do Not Disturb Feature’, you can add in whichever applications you’d like to keep to hand instead of the default shortcuts. To customise your control centre, head to Settings -> Control Centre -> Customise.
3) Slow apps? iPhone freezing? A forced reset could save the day
The Apple iPhone is essentially a computer and like many computers, it needs a reboot from time to time. A hard reset forces a reboot and can help when your iPhone slows down or freezes by fully closing down all applications and starting them up again from scratch – this does not mean wiping off everything you have stored. With no home button, the process for the iPhone X is slightly different to older models. To do so, press and quickly release the Volume Up button, then do the same for the Volume Down button. Follow up by pressing the Side button, and hold until the display suddenly shuts off — usually about 10 seconds. Release the side button once your device shows the Apple boot screen.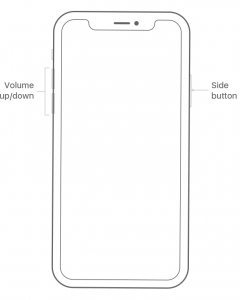
4) 4K recording
The iPhone X is capable of recording video at 4K 60fps, offering quadrupled resolution. This setting, however, is not active by default. To enable head to Settings -> Camera -> Record video -> Change from 1080p at 30fps to 4k at 60fps. Please note that 4K recordings consume more storage (Around 10.5GB (5.1GB) for 30 minutes) so uploading your videos to your laptop or PC is recommended.
5) Smarter Do Not Disturb
Do Not Disturb mode allows you to choose when you want to receive alerts, call and notifications. For instance, you can head to Settings -> Do Not Disturb and turn on Scheduled. This means you could set Do Not Disturb hours to Bedtime which, when enabled, will dim your lock screen, silence calls and send notifications to During Bedtime in your notification centre until your scheduled Do Not Disturb ends. You’re also able to allow calls from specific contacts or groups so that you can be reachable in case of an emergency, while taking a healthy break from work.
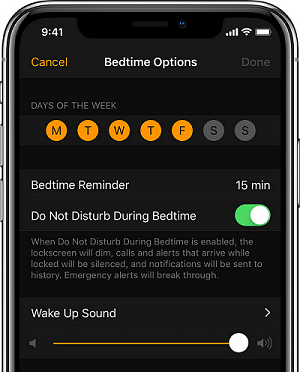
To do so, head to Settings -> Do Not Disturb and scroll down to Allow Calls From. You’ll be able to choose from ‘No One, Everyone, or Favourites”, which can be set up in your Contacts app.